Mike Hotchkins
Hello to all in the modelling world my name is Michael Hotchkins and my interest in models started when I found my fathers Micro Mold mk24 Spitfire and old helicopter under the stairs many years ago. The spark of interest was aroused so when I was old enough I started to learn how to fly aeroplanes then at 13 I started to become interested in helicopters.
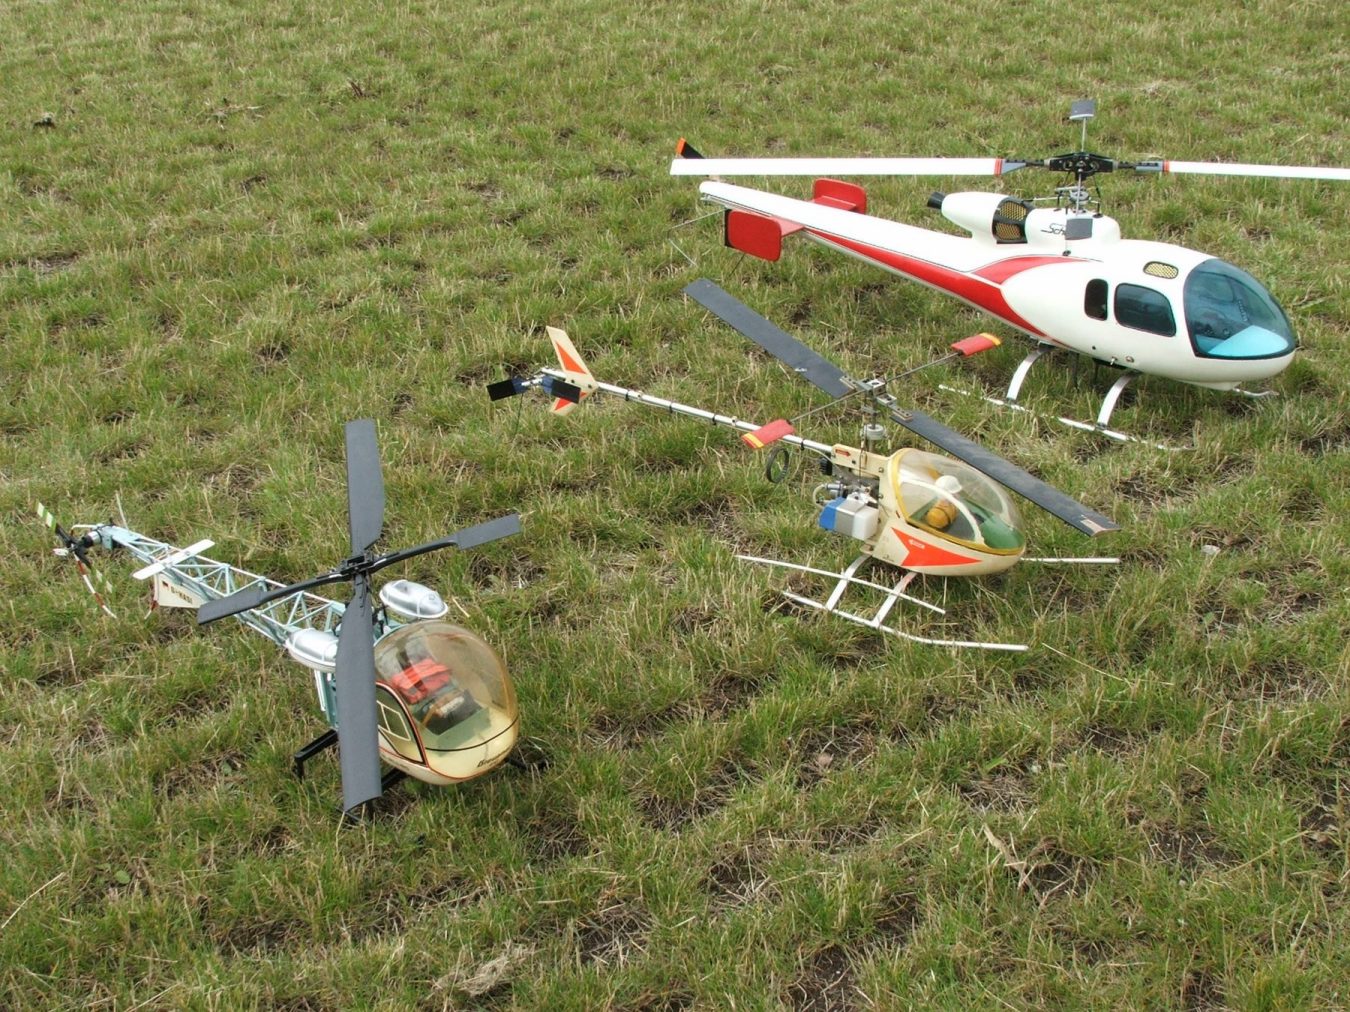
My first attempt was a MFA sport 500 fixed pitch with no gyro; good fun? After conquering the MFA I moved on to a Schlüter Moskito. and then a venture at which point my sanity took a bit of a turn I decided to have a dabble at some of the old school helicopters. My old man was always telling me about the olden days of flying with machines like the Heli-Baby, lark 2-25, Alouette and valve radios!!!!!!! So, I started to rebuild the helicopter from under the stairs; a vintage Kavan Alouette that is still flying to this day. I then moved on to a Heli-Baby followed by a MM Lark and so on.
Well, that a bit about me, I hope the info and pictures I can put forth may by useful and good luck if you do decide to restore an old helicopter; it's worth it....
Mike
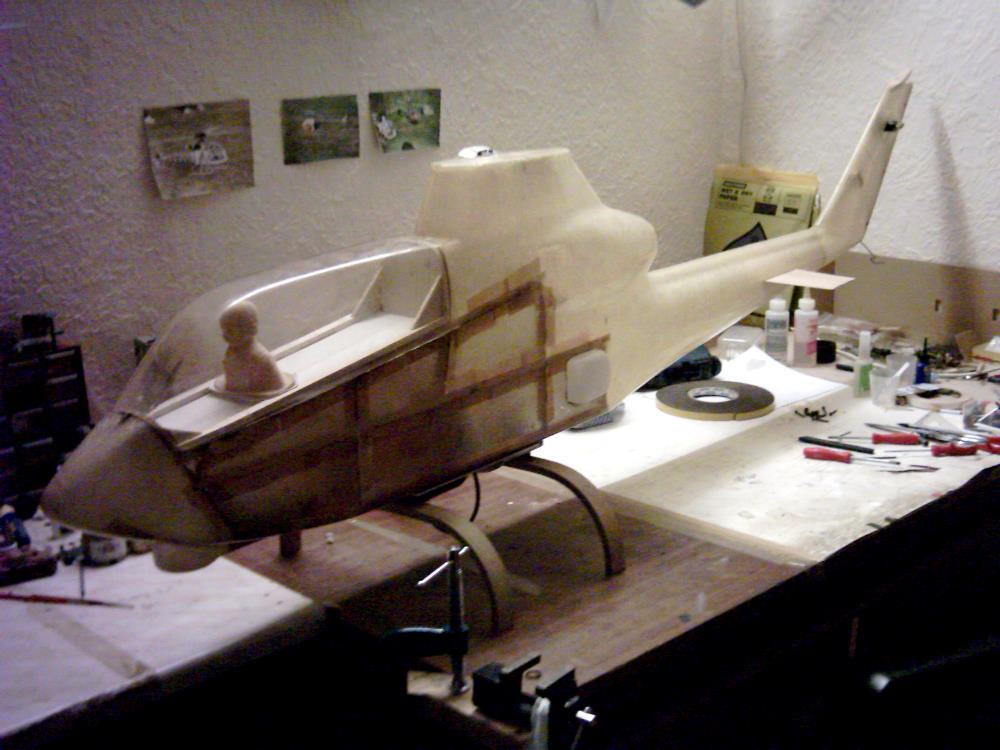
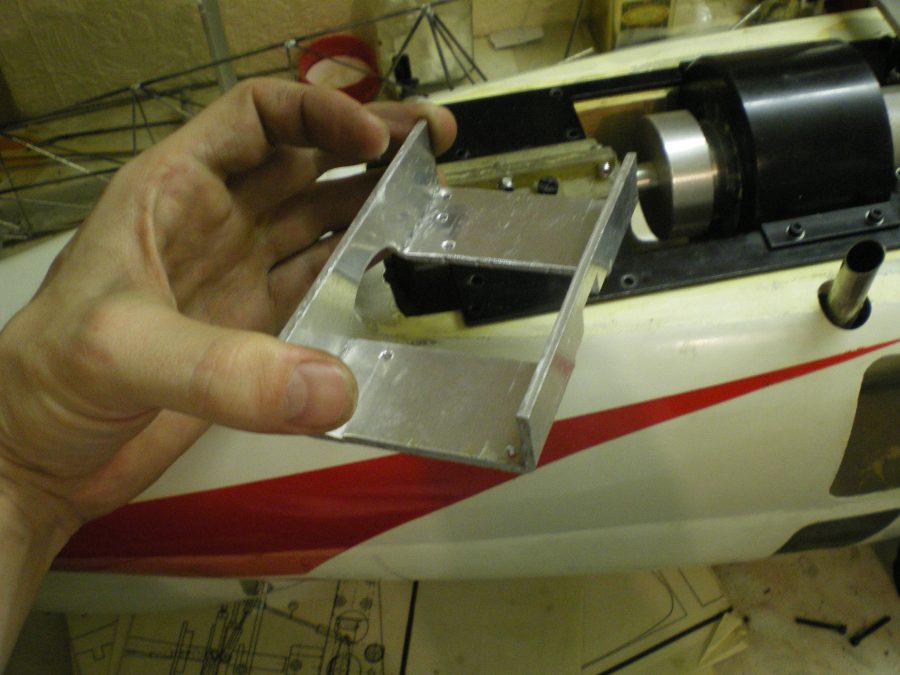

This is the story of my Schlüter Bell Huey cobra 1972 vintage. An 'un-built' kit and although not as complex as new kits of today there is still a lot to do. After inspecting the components and cleaning them up I started on the body. Some of the wooden formers had already been put in the fuselage and this is where I stumbled onto the first problem. Old fibreglass mouldings seem to weep and form an oily surface so trying to glue onto it can be difficult. So after a bit off head scratching I tried a few solvents then bingo, cellulose thinners proved to be perfect for providing a surface that would 'key'. Do not use too much, just wipe the surface then clean off using white spirit on a rag or it will melt the fibreglass away! With a good surface for bonding I finished the rest of the wood work. The cobra is built very similar to a plane fuselage and unlike modern practice there is a full size plan to work from and after assembling the rest of the formers I put the fuselage to one side and commenced on the mechanics. I placed all the components on the desk and cleaned them up ready for assembly; as you can see in the picture the gear box and drive train are all on a flat plate; known as flatbed mechanics (used by Hirobo for a number of their scale helicopters). Most of the components are aluminium but the gear box housing is plastic and known for being weak with breakages not uncommon I therefore decided to upgrade the system. The motor and gearbox can flex slightly so by putting a reinforcement bracket under the gearbox and thus making the assembly more rigid seems to solve the reliability problem. I also made a collar for the top of the mast and used another bearing plate placed upside down to mate up with the collar so that the rotor system is not hanging off the gear box but properly supported. Unlike most modern machines the gearbox is enclosed and oil filled rather than open to the elements. Unfortunately, the cooling system on the the machine is not particularly efficient especially compared to modern standards so over heating can be a problem unless flights are kept short. Assembly of the gearbox can be a little fiddly comparison to modern machines but with basic mechanical knowledge it is quite a joy to build. The drive system to the tail uses a flexible cable inside a brass tube that needs to be glued in place down the length of the tail to prevent it vibrating. The tail gearbox assembly bolts to a wooden plate that is glued in place inside the fin cavity with the pitch control arm and mechanism pretty much the same as modern helicopters; what worked then still works now.
Moving to the rotor head and this has to be one of the most basic heads to build because it is a basic fixed pitch set up with 'flat bottomed' blades as only positive lift is required. Being fixed pitch, cyclic control is by the 'Hiller' paddle system which is inherently slow compared to the modern collective pitch systems that allows both hiller and bell control of the main blades. Alternatively, semi-symmetrical blades can be used though these require a higher head speed for the same lift however this gives an improvement in cyclic response and better flying characteristics both in the circuit and approach.
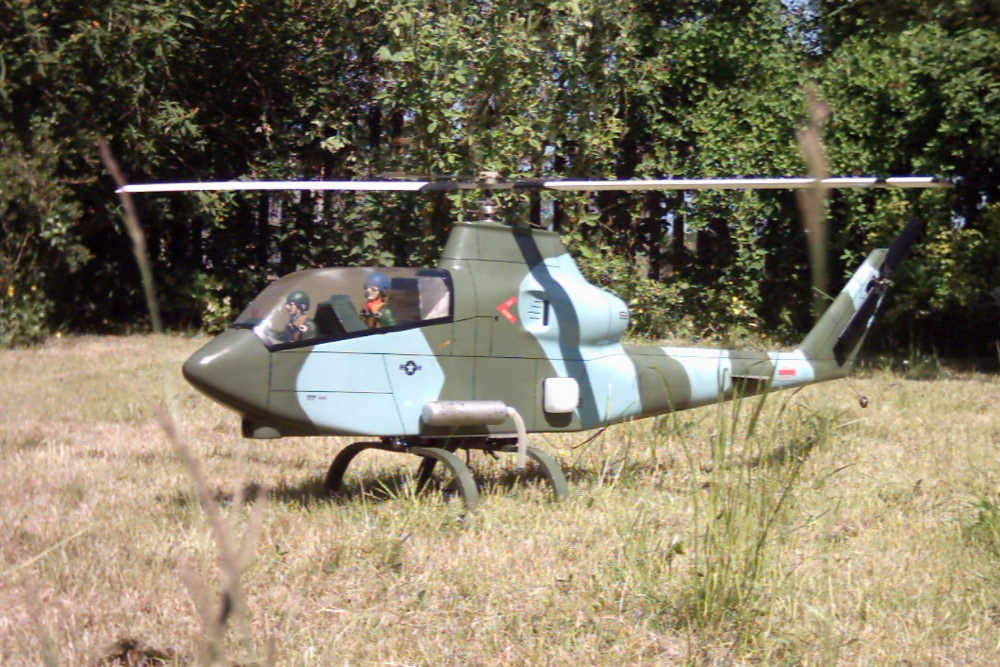
OK, getting near to the end of completion now just the paint scheme and radio to fit. There are numerous colour schemes for the Cobra however I decide to go with the camouflage version. Leaf green and Nordic blue for the main colours and to make up the panel affect I cut fablon (sticky back plastic) into strips to makeup the lines around the body. the cockpit was made up from card and complimented with two 1/8 scale pilots and though this took quite some time and effort , it was worth it as can be seen in the photo's.
The servo's are fitted under the cockpit floor and there are (of course) only four used in this model plus NO gyro! Setting up the controls was extremely simple and then just a matter of starting the engine and up into the hover. Final photo's show that 'vintage' helicopters can still be appreciated as my Huey was featured in a well known RC helicopter magazine.