The story so far - Plan B - Installation - For the intrepid - Plans - Conclusion - Titch 2
Part of the exercise here was to find out whether depron really was that light and maybe there was a better way. I also wanted to try the sort of wing section that is currently used on full-size aerobatic aircraft with a very blunt leading sdge.
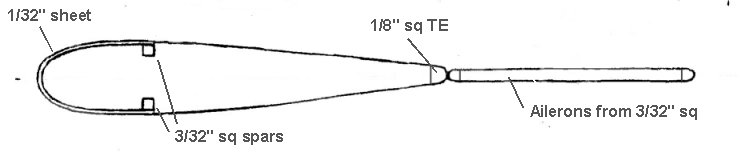
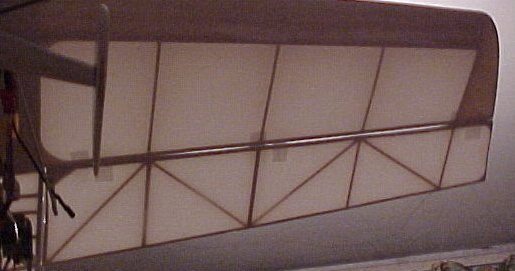
This was produced by wrapping 1/32" sheet around the ribs with no actual leading edge as such. Covering was Solarfilm 'Solite' which added a total of 6 g to the basic airframe weight. Finished weight was 86 g - just 6 g more than the depron version - and no struts. The other big improvement here is that the battery (originally a 2 x 340 mAh Li-Poly) went inside the wing.
I was expecting a good performance with a direct drive GWS EDP50 unit and a 3 x 2 Union 'U80' prop. This combination worked well on the ''nd 'ow' and the 'Micro 2DX' at the same weight or heavier. Early flights were on a very cold morning, which may have affected the Li-Po performance, but it barely managed to fly. It has since become clear that the problem is the wing section, which is disappointing.
The first flight was on a very cold morning and one result was that I broke one of the U/C legs on landing. A 3 ounce model breaking a 1.5mm carbon leg is amazing! Subsequent flights without the undercarriage - and in warmer conditions - revealed that the model would fly but it is clearly on the wrong end of the drag curve and won't even get over the top of a loop, though rolls are fine. Changing to a 250 mAh Li-Poly pack saved 9 g and made a significant improvement. One landing in wet grass, however, added enough weight to make things very marginal. Note that the model was now fractionally lighter than the depron version.
Further flights with the 250 Li-Poly and no U/C showed that the model had reasonable performance in normal temperatures but power dropped off noticeably after about 2 minutes and the maximum flight time was around four and a half minutes. Replacing the U/C made only a slight difference at a flying weight of 80 g.
That wing section produces all sorts of interesting conditions. With power dropping off you need to nurse the elevator and too much in a turn makes the model roll out. I thought at first that the wing was out of balance, but it does it both ways. However, if you are flying low (in ground effect) too much elevator causes it to roll into the ground!
The one characteristic that I really didn't like was that it could get into a superstall condition where it simply drifted along nose high and totally ignored any aileron input. Try the rudder instead and it would snap into the ground. It would knifedge quite nicely until speed dropped when it would simply roll out.
There is another side to this (of course) in that when it is 'on the step' with a fully charged battery it is very fast. With an indoor receiver, it is hard work to keep it in range.
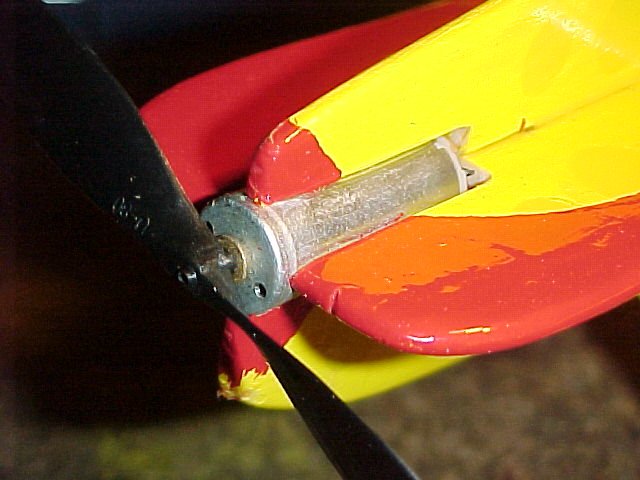
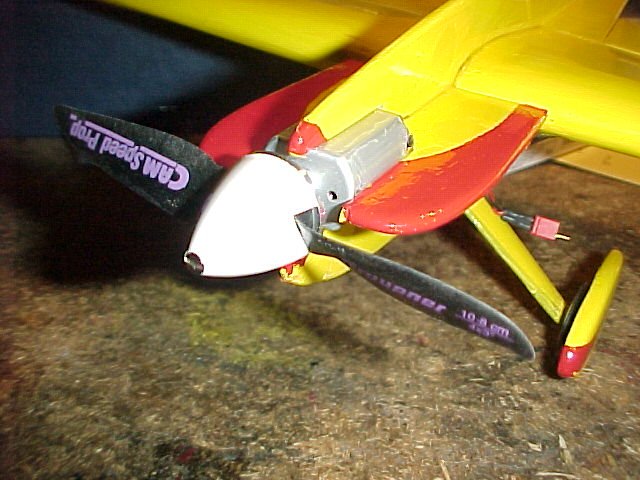
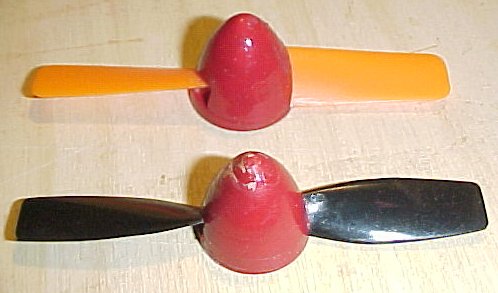
When it became clear that more power would be a good idea, I obtained a motor, prop and spinner set that is sold for use in the Graupner 'Nemesis'. This is a 'Speed 250' motor with a 4 x 3 prop. The problem is that it is 13 g heavier than the GWS unit (a 16% increase) and all of that goes on the nose. The good news was that there was no need to change anything else.
With that in mind, I amassed nearly 60 flights in its original from before deciding to modify it.
I wish I could say that it was a sucess! It added 12 g and brought the weight up to 92 g with the 250 Li-Poly. It simply refused to do anything more than a powered glide. At this point, I did what I should have done earlier and checked the RPM and current on the 4 x 3 prop - 10500 RPM and 1.25 A current draw. Maybe I have a bad motor, but I simply don't believe that it would fly a 'Nemesis'. A second motor had exactly the same performance.
On impulse, I tried it with a Gunther prop. At least, it just about flew, but still a waste of time. RPM was 6000 at 1.75 amps.
I then split up one of my 250 mAh Li-Poly packs to produce a 3 cell pack. Quite good performance at first, dropping off rapidly and almost gone after 20 seconds. By repeated relaunches I eventually got about 4 minutes in 45 second hops. The reason was clear when I checked the performance - 12000 RPM at 2.4 amps! The cells are rated at 2 amp maximum. Any increase in cell size to cope with the current will push the flying weight well over 100 g.
It looks like I have no option but to cut into the nose again and go back to the GWS motor.
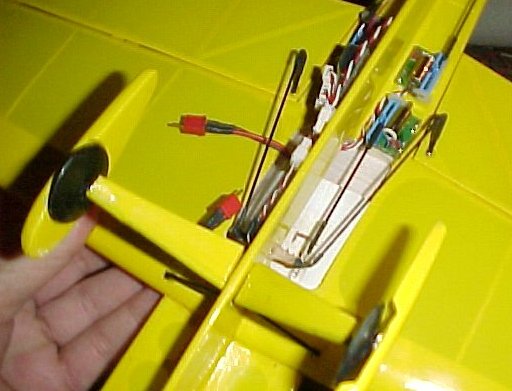
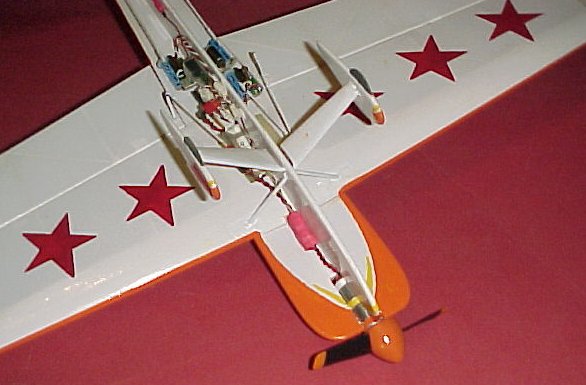
The three servos were simply stuck to the airframe with servo tape. Pushrods were made up from 1mm carbon rod and the 'horns' were 1.5mm carbon. Small heatshrink tubing was used to connect the pushrods to the horns - no slop. A rocker bar was made up to operate the ailerons, with a separate pushrod to the servo. As the servo has a linear output this is really the only way to do it.
 | Aileron rocker from 1/32" ply. Note later extension to reduce movement. All linkages from heatshrink tubing. |
The ESC was a JMP 9 which had been given to me by someone who could not get on with it. His problem was that he was using it in a 'V' tail model and every time he gave a control input the throttle hesitated because he was overloading the BEC. I simply added another voltage regulator chip on top of the existing one and cured it.
Use the lightest wood that you are happy with. Solite covering is a joy to use provided that you don't let it stick to itself. Once the glue has been activated with heat, this stops being a problem and you can handle the thin surfaces without any fear of the two sides sticking. If they do stick, the only cure is to recover that bit. Trim can be added with Humbrol enamel. The trim shown added less than 1 g.
Before I changed the motor, more flying showed that it is capable of rolling circles and knife-edge, but can barely stagger over a loop. In certain situations it simply stops flying but is so stable that it simply descends without any unexpected moves.
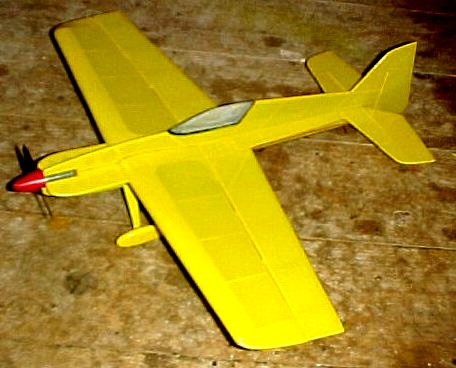
I took the original 'Titch' along to an indoor F/F meeting for an appraisal. The overwhelming consensus was that the ultra-glossy 'Solite' covering was affecting the performance and that tissue covering would fly better. This seemed logical, so I decided to build another. The two main objectives were to reduce the weight and find more power.
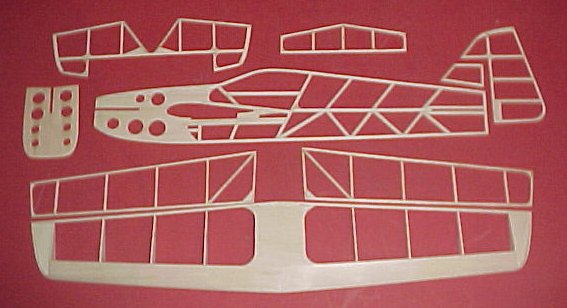
Basic structure - 16 grams.
I had acquired a Feigao '1208436L' motor and a cheap chinese brushless controller (from RCM Direct). By rewiring the controller (including replacing the link which selected 2 or 3 Li-Poly cells with a short) and connecting it directly to the motor, the total weight of the motor and controller was only 2 g more than the GWS/JMP set-up.
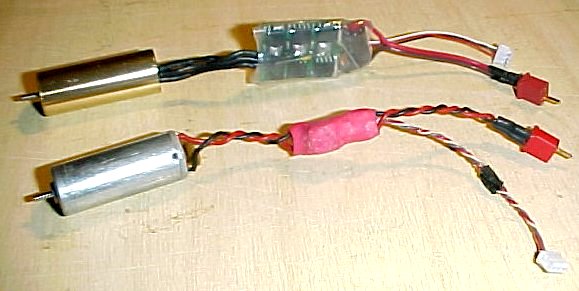
GWS/JMP unit at front, Feigao/RCM unit behind.
The RPM on both the Union and GWS props increased from 17,000 to 20,000 - a fair increase. Current increased from a little under 2 amps to 3 amps. The E-Tec 250 mAh cells that I had been using were already on their limit. I have obtained a pair of Fullriver cells rated at 300 mAH and 10C, which should be able to cope. These weigh 1 gram less. If all else fails, I can go back to the old 340 mAh Kokam cells, though this will add 9 grams.
GWS 3 x 2 at rear, Union 'U80' in front, both with balsa spinners.
You really should change things one at a time, but I decided to alter the wing section to give a more conventional leading edge shape in addition to changing the covering (but see below). I also changed the front fuselage construction slightly to reinforce the point that I used for hand-launching. These changes are detailed on sheet 5 of the plans above.
At this point, I had the structure and all the bits but couldn't find what I considered to be usable tissue, bearing in mind that the model would be flown out of doors. A posting on the Stuka Stunt Forum gave weights for various coverings. This showed that there really wasn't much to choose between them. While there were tissues that were lighter than film, you had the extra work - and weight - of attaching to the framework. Add a minimum of dope and your model is not going to be much lighter - if at all. So, from the point of view of practically, tissue could be a real handicap.
When you are covering a very thin surface, it is easy to let the covering on one side touch the covering on the opposing side. Interestingly, once the glue has been activated by running an iron over it, it is much less inclined to stick. You can help things a little by shrinking one side before you cover the other, but once they attach themselves there is little that you can do other than to recover and be more careful. The problem is that once it happens, it looks awful and you have to do something.
To cut a long story short, I covered both ailerons twice before deciding that I had had enough of peeling off little bits of film and it would be easier to make two new ailerons! What to do? I redesigned the ailerons to make the panels to be covered smaller and less likely to let the covering touch. I anybody asks, I did this to make the ailerons more rigid, OK?
New aileron structure to reduce the size of the panels. No, I'm not happy with the hinge line.
The real answer. of course, would be to cover the model with one of the polyester tissues and use 'Balsaloc' to attach it. That way, the covering only sticks where you want it to stick. You may remember that I discarded that approach after much thought!
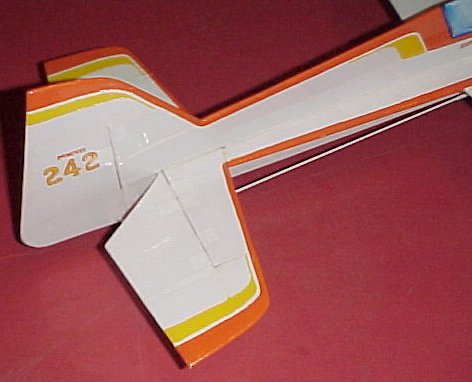
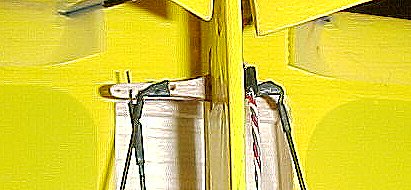
My first model had small streamlined plastic wheels with the spats installed on the end of the axle like a shock flyer. As the model is normally flown outdoors, the wheels are just added weight so I replaced them with partial discs of 1/32" ply glued to the spats which were a single layer of 1/8" balsa. I figure that if the model is flown indoors, these should slide easily across a typical floor.

I used all of the gear and linkages from the first model and installed the GWS motor/JMP ESC combination for a direct comparison. Weight complete (with the E-Tec 250 mAh pack), but without any trim, came to 77 grams. Thats disappointing as it is only about 5 grams lighter. The missing wheels probably account for most of that.
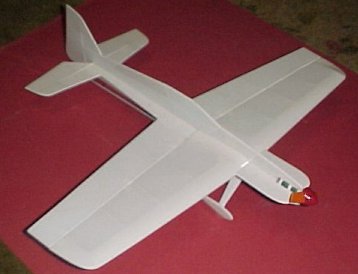

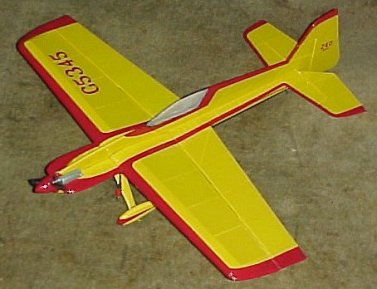
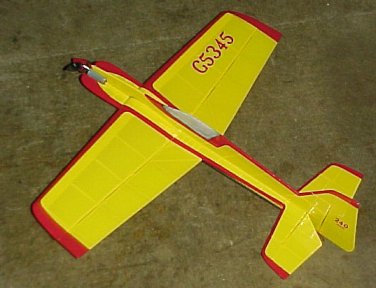
Titch2 complete and unadorned - 77 grams.
However, switching to the 300 mAh Fullriver pack gave a startling improvement. It flew very much like a conventional shock flyer and sailed over loops. There was a down side, though, it is very fast. The difference in the battery packs is explained by the fact that the E-Tec 250 mAh pack is rated at 7C and is being pushed at close to 2 amps, while the Fullriver 300 mAh cells are rated at 10 - 12C and can supply up to 4 amps.
More flying revealed that the wing section did make a difference in that flying at reduced power gave a better performance than previously. In fact, the first model really couldn't be flown on reduced power at all. There is certainly an improvement in penetration and the model will perform large fast loops. Application of more 'G' results in a reduction of speed and eventually a stall rather than a dead stop.
So, after all that, the only thing that makes a real difference is power. The downside of that, of course, is that the model is very fast. Add to that the large control surfaces, designed for slow flying, and the model is very twitchy and needs a high tech transmitter to make it comfortable to fly.